Wondering what to do with all that powdery white snow left over after a winter storm? Why not make ice cream? Bonus points if you eat it during a polar vortex!
I grew up in sunny Southern California, so I’m pretty sure snow will always be a novelty for me. As such, any winter storm with snow accumulation is an occasion for celebration in our household!
I watch the winter weather forecasts like a hawk. As soon as I see a few inches of snow in the forecast, I start to get very excited. Time to break out all the gear for some fun in the snow, as well as our warmest blankets, a stack of good books, and the mugs of hot chocolate for once we come inside.
However, as someone who did not grow up with snow, I get introduced to new snow day traditions by my snow-loving, Ohio-born-and-raised husband every year. And this year, I discovered my favorite use for freshly fallen, powdery snow – snow ice cream!
I’ll admit, I’d heard of snow ice cream before. I assumed it was kind of like a snow cone and would be icy and kind of disappointing. Boy, was I wrong!
Is it just as creamy as store-bought ice cream, or my easy 3-ingredient homemade ice cream? Not quite. But it takes less than five minutes, no wait time, and is a truly delicious snow day treat!

What snow is best for snow ice cream?
The more powdery and fresher the better! Any icy bits won’t incorporate as well into the cream, so you really want to get the loose, powdery stuff if you can. It seems to me that if you can’t build a snow man or have a snow ball fight because it’s too powdery, it’s ideal for making snow ice cream!
That being said, wetter snow will work too. Just be forewarned that the texture won’t be quite as good – but the flavor will be delicious no matter what!
What’s the best way to collect the snow for snow ice cream?
If you’re getting a lot of snow, place a bowl outside at the beginning of the storm to collect it fresh. Bring it in when the bowl is full or scoop a bit more in when you want the ice cream and mix it up.
If you don’t get a bowl out in time, make sure to collect it from a clean spot – undisturbed, freshly fallen snow that isn’t too close to the ground. Don’t collect snow from areas that have been walked on, shoveled, salted, or otherwise tampered with. We’re looking for clean, white snow!

What if I don’t have heavy cream?
Half-and-half or evaporated milk will also work, but make sure that they’re cold when you add the snow. It won’t be quite as creamy, but it will certainly do the trick. You can also use sweetened condensed milk, though if you do that, don’t add more sugar – it should be plenty sweet already!
Can I use other sweeteners or add other things in?
Yes! Feel free to use alternative sweeteners – honey, maple syrup, and raw sugar should all work, though the flavor might be a bit different than with plain white sugar. And feel free to play around with mix-ins and other flavorings!
The beauty of snow ice cream is that everyone can make their own bowl to their own liking. Just divide up the base recipe (cream, sugar, and snow) with one station per person and let everyone experiment to their heart’s content.
Cocoa powder, other flavor extracts, chocolate chips, caramel sauce, chocolate sauce, and nuts are my top choices for experimentation. Sprinkles, dried fruit, and other creative mix-ins would be fun too. I don’t think you can go wrong here!

Does snow ice cream make good leftovers?
I wouldn’t recommend it. Make what you plan to eat and enjoy it. A snow day is a good excuse to indulge just a bit anyway!

Ingredients
- 1/2 cup cream – half-and-half or evaporated milk will work too
- 1/4 cup white sugar – other sweeteners will work too. Adjust to taste.
- 1 tsp vanilla extract – or other flavor extract. Lemon, orange, almond, and peppermint would all be yummy, but vanilla is a classic starting point.
- 4-6 cups of snow

Directions
Step 1: Before you collect your snow or while you collect it, whisk the sugar and vanilla into the cream in a large bowl until fully incorporated.

Step 2: Collect your snow!
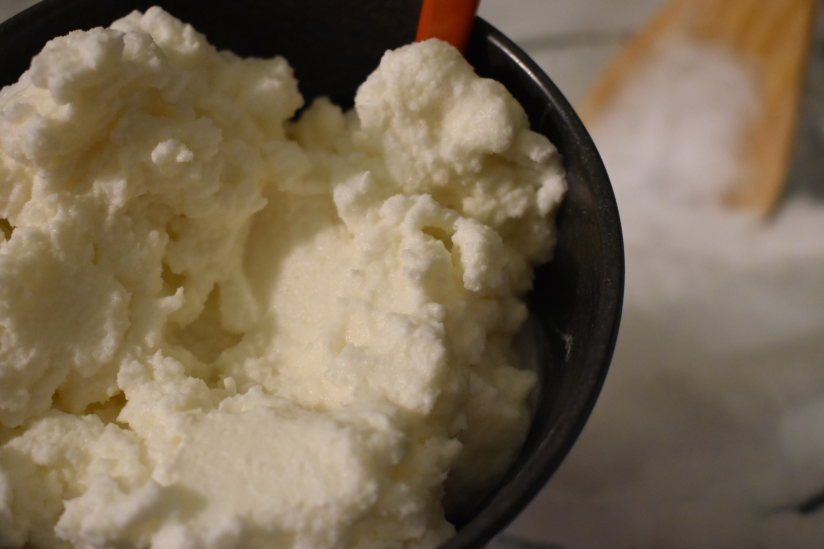
Step 3: A few scoops at a time, add the snow to the cream mixture. Slowly and gently fold it in using a spatula.

Step 4: Keep adding snow until it reaches your desired consistency. Enjoy immediately!

Equipment
*Disclosure: I only recommend products that I use or would use myself. The links above are affiliate links, which means that I earn a commission (at no cost to you!) if you make a purchase using the link.

Snow Ice Cream (Easy Snow Day Treat!)
What better way to spend a snow day than making some snow ice cream? A perfect treat for little ones and grown-ups alike!
- Total Time: 5 minutes
- Yield: 3 servings
Ingredients
- 1/2 cup cream
- 1/4 cup white sugar
- 1 tsp vanilla extract
- 4-6 cups of snow
Instructions
- Before you collect your snow or while you collect it, whisk the sugar and vanilla extract into the cream in a large bowl until fully incorporated.
- Collect your snow!
- A few scoops at a time, add the snow to the cream mixture. Slowly and gently fold it in using a spatula.
- Keep adding snow until it reaches your desired consistency. Enjoy immediately!
- Prep Time: 5 minutes
- Cook Time: 0 minutes
- Category: Dessert
- Method: No cook
- Cuisine: American
- Diet: Gluten-Free, Vegetarian
Nutrition Facts
Amount Per Serving
Calories: 185 kcal
Fat: 12g
Total Carbohydrates: 18g
Fiber: 0g
Protein: 1g
The nutrition data provided here is for informational only and is only an estimate based on an online nutrition calculator. It cannot be verified or guaranteed, and should not be used in the treatment of medical conditions. It should not be considered a substitute for a professional nutritionist’s advice This data should be interpreted and used at your own risk.


Leave a Reply