Growing up in Southern California near the Mexican border, I thought I knew good tortillas. However, those are no match to these sourdough tortillas with fresh milled flour!
After about a year and a half of making sourdough and hearing about all the benefits of fresh milled flour, I finally caved and got a grain mill. I knew it would be better than making sourdough with store-bought flour, but I had no idea what a difference it would make for our health (and for our tastebuds). Seriously. Pair the incredible flavor of fresh milled flour with a bit of sourdough tang and I think I’ve died and gone straight to heaven.
The first time I made sourdough tortillas with fresh milled flour, I experimented by taking a sourdough tortilla recipe I loved and long fermenting it. It took some messing around with hydration ratios to get this just right, but these are – no joke – the best tortillas ever.
They’re easy, fail-proof, and the dough is a joy to work with (no sticky messes when rolling them out). And if you start them in the morning, they’re ready to roll out and cook in the early afternoon so you’re ready for taco night.

What are the health benefits of sourdough tortillas with freshly milled flour?
I’ll make a longer post about the benefits of sourdough and freshly milled flour in general someday, but in short, our family has noticed:
- Much greater satiety – We eat half as many tacos now as when we used store-bought tortillas or even sourdough tortillas with store-bought flour. The tortillas are just so much more satisfying!
- Better blood sugar control – I haven’t done extensive testing on this – just a few data points here and there. However, my husband and I have noticed that when we eat a meal that contains baked goods with freshly milled flour and check out blood sugar with a finger-prick glucometer, our postprandial blood sugars are pretty close to our fasting numbers. That means that, unlike things made with store-bought flour (which often cause blood sugar to spike and crash), baked goods made with freshly milled flour keep our blood sugar stable.
- Improved gut health – this may be a bit TMI, but as someone who really struggles with “regularity” in pregnancy, I have noticed a huge difference in my digestion. Not only am I much more regular now than I was even pre-pregnancy, but I also have not dealt with any bloating or gut issues since we made the switch to freshly milled flour. I’ve noticed a difference with our toddler as well, and my husband says it has also been a huge improvement for him.

Do I have to long-ferment these sourdough tortillas with fresh milled flour?
If you just want them to rise, nope – the baking soda takes care of that. However, I recommend letting them long-ferment (or even ferment for a few hours) for all of the benefits of sourdough fermentation! Just a few of the benefits of sourdough fermentation include:
- Better blood sugar control – Just as fresh milled flour helps with blood sugar control, so does sourdough fermentation. During fermentation, the yeast and bacteria eat the starches and produce various acids (lactic, acetic, and propionic) that lower the rate of starch digestion and gastric emptying in our bodies. Some amino acids (proteins!) are produced during fermentation that also help with glucose metabolism.
- Better vitamin and mineral absorption – Fermentation reduces phytic acid (more present in fresh milled flour than in store-bought flour), which allows your body to absorb more of the iron, zinc, and magnesium present in freshly milled flour. Sourdough fermentation also increase the levels of several B vitamins, like thiamin (B1) and riboflavin (B2), some of which are lost in cooking. Because fermentation increases those levels, the final bread ends up having more than if it was not long-fermented!
- Easier to digest – Sourdough fermentation breaks down some of the gluten, making it easier on your gut. And I’ve even heard stories about people with gluten sensitivities being able to handle real sourdough products!
- Longer shelf life – The acids produced as a result of sourdough fermentation help baked goods (like tortillas) stay fresh longer without all the additives you find in store-bought products.
- Improved flavor – This is just my opinion, but I love a bit of sourdough tang. That paired with the slight nuttiness of fresh milled flour – oh, I’m in heaven!
Can I make these tortillas using sourdough discard?
It depends on how old your discard is and your goals. The tortillas should still turn out fine with discard, but they may not ferment very well if your discard is really old because the yeast may no longer be alive. However, I almost always make these using sourdough starter from the fridge (fed a few days or no more than a week prior). It takes a little longer to ferment, unless you use warm water to help the yeast wake up and get active again.

What do sourdough tortillas with fresh milled flour taste like?
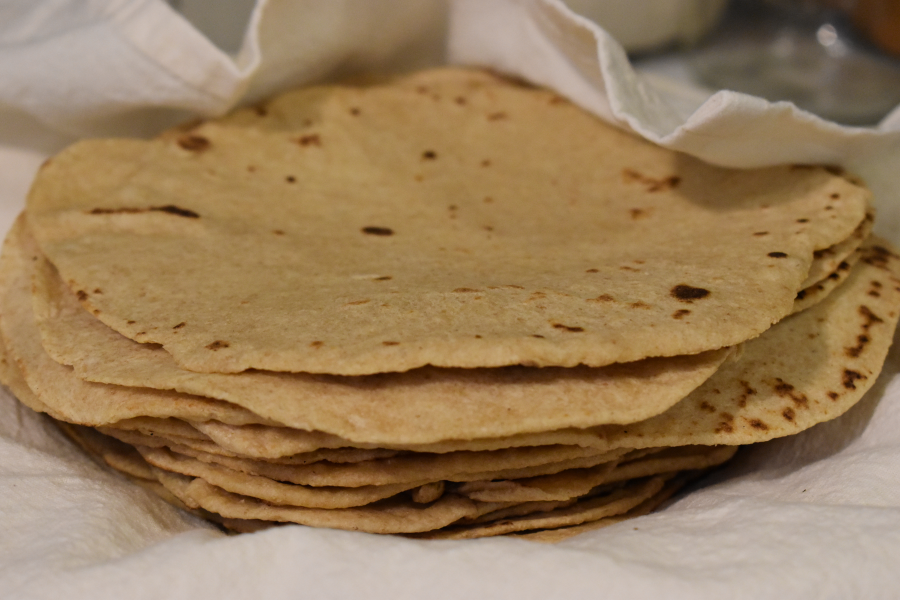
They have the same texture as normal tortillas, with just a hint of tang from the sourdough and a bit of nuttiness from the fresh milled flour. Normal tortillas can be a bit bland, but these are a delight all by themselves.
However, they really shine when you turn them into tacos, burritos, or quesadillas! Again, that slight sourdough tang is the perfect complement to the richer fillings you normally find in Mexican food. For the best bean & cheese burrito of your life, try filling them with my easy refried beans!

What should I serve with these tortillas?
Serve them as you would serve any other tortillas. For a quick and easy taco night, I’ll add some taco seasoning to shredded chicken and make a side of refried beans. Top with your favorite toppings and you’re all set!
Tortillas are also amazing served with chili! You can also make burritos, quesadillas, wraps, or homemade tortilla chips.

How long are sourdough tortillas with fresh milled flour good for?
They’re best the first day or two, but can last up to a week if stored in an airtight container/bag in the fridge. When they become hard and/or stale, reheat them briefly on the stove or in the microwave to refresh them. They can also be frozen for up to 3 months.
Stale tortillas are especially great for quesadillas, homemade chips, or for use in casseroles!

Ingredients
- 240g water – use room temperature water for active, bubbly starter or warm water for starter from the fridge (or somewhat fresh discard).
- 75g sourdough starter – either active and bubbly or from the fridge is fine. I wouldn’t recommend super old discard since it may not ferment as well, but they should at least rise thanks to the baking powder.
- 400g soft white wheat
- 1 tsp sea salt
- 1 tsp baking powder
- 2 tbsp butter, melted – any healthy fat will do, as long as it is in liquid form. I’ve had great success with melted tallow and olive oil!

Directions
Step 1: Mix water and sourdough starter in a small bowl. Set aside.

Step 2: Mix together flour, salt, and baking powder in a large bowl.

Step 3: Add melted butter to the dry ingredients. Work it in until the dough has a sandy texture with no large clumps.

Step 4: Add the water and starter to the dry ingredients. Mix with a wooden spoon (or with your hands) until there are no dry bits left in the bowl.

Step 5: Cover, set somewhere warm, and allow to ferment until doubled, about 6-8 hours. If your kitchen is on the cooler side and your oven does not have a “bread proof” setting, plan to allow it to ferment 8-12 hours.

Step 6: Divide the dough into 16 pieces (or 8 for burrito-sized tortillas). Gently shape each piece into a ball, being careful not to overwork the dough.

Step 7: Place the dough balls on a baking sheet, cover, and allow to rest for 30 minutes.

Step 8: Heat a cast iron skillet over medium heat. Roll out the dough balls one at a time into 6” circles (flouring surface lightly only if needed – I did not find that this dough stuck at all). Keep the other dough covered to prevent it from forming a crust.

Step 9: Cook each tortilla on the first side until it starts to bubble, about a minute or two, then flip and cook on the other side for about a minute. I like to get some light char marking, but if you prefer it without, lower the heat just a touch.

Step 10: Place cooked tortillas in a towel, ideally inside a covered bowl or other sealed dish to steam and soften. I use an insulated serving dish that works wonders. Best served warm!

Equipment
*Disclosure: I only recommend products that I use or would use myself. The links above are affiliate links, which means that I earn a commission (at no cost to you!) if you make a purchase using the link.

Sourdough Tortillas with Fresh Milled Flour
The best tortillas you’ve ever had, with all the benefits of long-fermented sourdough and fresh milled flour. Start them in the morning and they’ll be ready by dinnertime!
- Total Time: 8 hours 50 minutes
- Yield: 16 tortillas
Ingredients
- 240g water
- 75g sourdough starter
- 400g soft white wheat
- 1 tsp sea salt
- 1 tsp baking powder
- 2 tbsp butter, melted
Instructions
- Mix water and sourdough starter in a small bowl. Set aside.
- Mix together flour, salt, and baking powder in a large bowl.
- Add melted butter to the dry ingredients. Work it in until the dough has a sandy texture with no large clumps.
- Add the water and starter to the dry ingredients. Mix with a wooden spoon (or with your hands) until there are no dry bits left in the bowl.
- Cover, set somewhere warm, and allow to ferment about 6-8 hours. If your kitchen is on the cooler side and your oven does not have a “bread proof” setting, plan to allow it to ferment 8-12 hours.
- Divide the dough into 16 pieces (or 8 for burrito-sized tortillas). Gently shape each piece into a ball, being careful not to overwork the dough.
- Place the dough balls on a baking sheet, cover, and allow to rest for 30 minutes.
- Heat a cast iron skillet over medium heat. Roll out the dough balls one at a time into 6” circles (flouring surface lightly only if needed – I did not find that this dough stuck at all). Keep the other dough covered to prevent it from forming a crust.
- Cook each tortilla on the first side until it starts to bubble, about a minute or two, then flip and cook on the other side for about a minute. I like to get some light char marking, but if you prefer it without, lower the heat just a touch.
- Place cooked tortillas in a towel, ideally inside a covered bowl or other sealed dish to steam and soften. Best served warm!
Notes
- Use room temperature water for active, bubbly starter or warm water for starter from the fridge (or somewhat fresh discard).
- Store cooled tortillas in an airtight container/bag. They’re best the first day or two, but can last up to a week if stored in the fridge. When they become hard and/or stale, reheat them briefly on the stove or in the microwave to refresh them. They can also be frozen for up to 3 months.
- Stale tortillas are great for quesadillas, homemade chips, or for use in casseroles!
- Prep Time: 10 minutes
- Fermentation Time: 8 hours
- Cook Time: 40 minutes
- Category: Side Dish, Snack
- Method: Stovetop
- Cuisine: Mexican
- Diet: Pescatarian, Vegan, Vegetarian
Nutrition Facts
Amount Per Serving
Calories: 104 kcal
Fat: 2g
Total Carbohydrates: 19g
Fiber: 3g
Protein: 4g
The nutrition data provided here is for informational only and is only an estimate based on an online nutrition calculator. It cannot be verified or guaranteed, and should not be used in the treatment of medical conditions. It should not be considered a substitute for a professional nutritionist’s advice This data should be interpreted and used at your own risk.


Leave a Reply